
Carrying an external battery sounds like a simple affair, but when you’re operating portable, and tired from a tough hike, or setting up in a blowing gale, every separate bit of kit feels more like a required-effort multiplier rather than a simple addition. And so it was that my QMX ended up with a battery backpack.
The parts:
- 1x VE7ZAX QMX Buddy Back – Shallow
- 1x XT60 male cap
- 3x 102050 3.7V 1000mAh Lipo Cells
- 1x S3 LiPo BMS
- 1x XT60 Socket
The Case
The QMX Buddy Back comes in three 5 depths, each with an additional vertical height of:
- X-Shallow: 5 mm
- Shallow: 10 mm
- Medium: 15 mm
- Deep: 20 mm
- X-Deep: 25 mm
I used the shallow size.
As standard the case has no holes for connecting power, so had planned on drilling and filing. Fortunately a friend is a bit of a 3D printing wiz, and modified the model to add the hole.
Once printed the XT60 connector was attached with a liberal application of super glue. the end of the connector sits flush with the outside of the case. I printed the XT60 cap too, so that the power pins were tucked away safely from any potential short circuits lurking in my bag whilst walking.


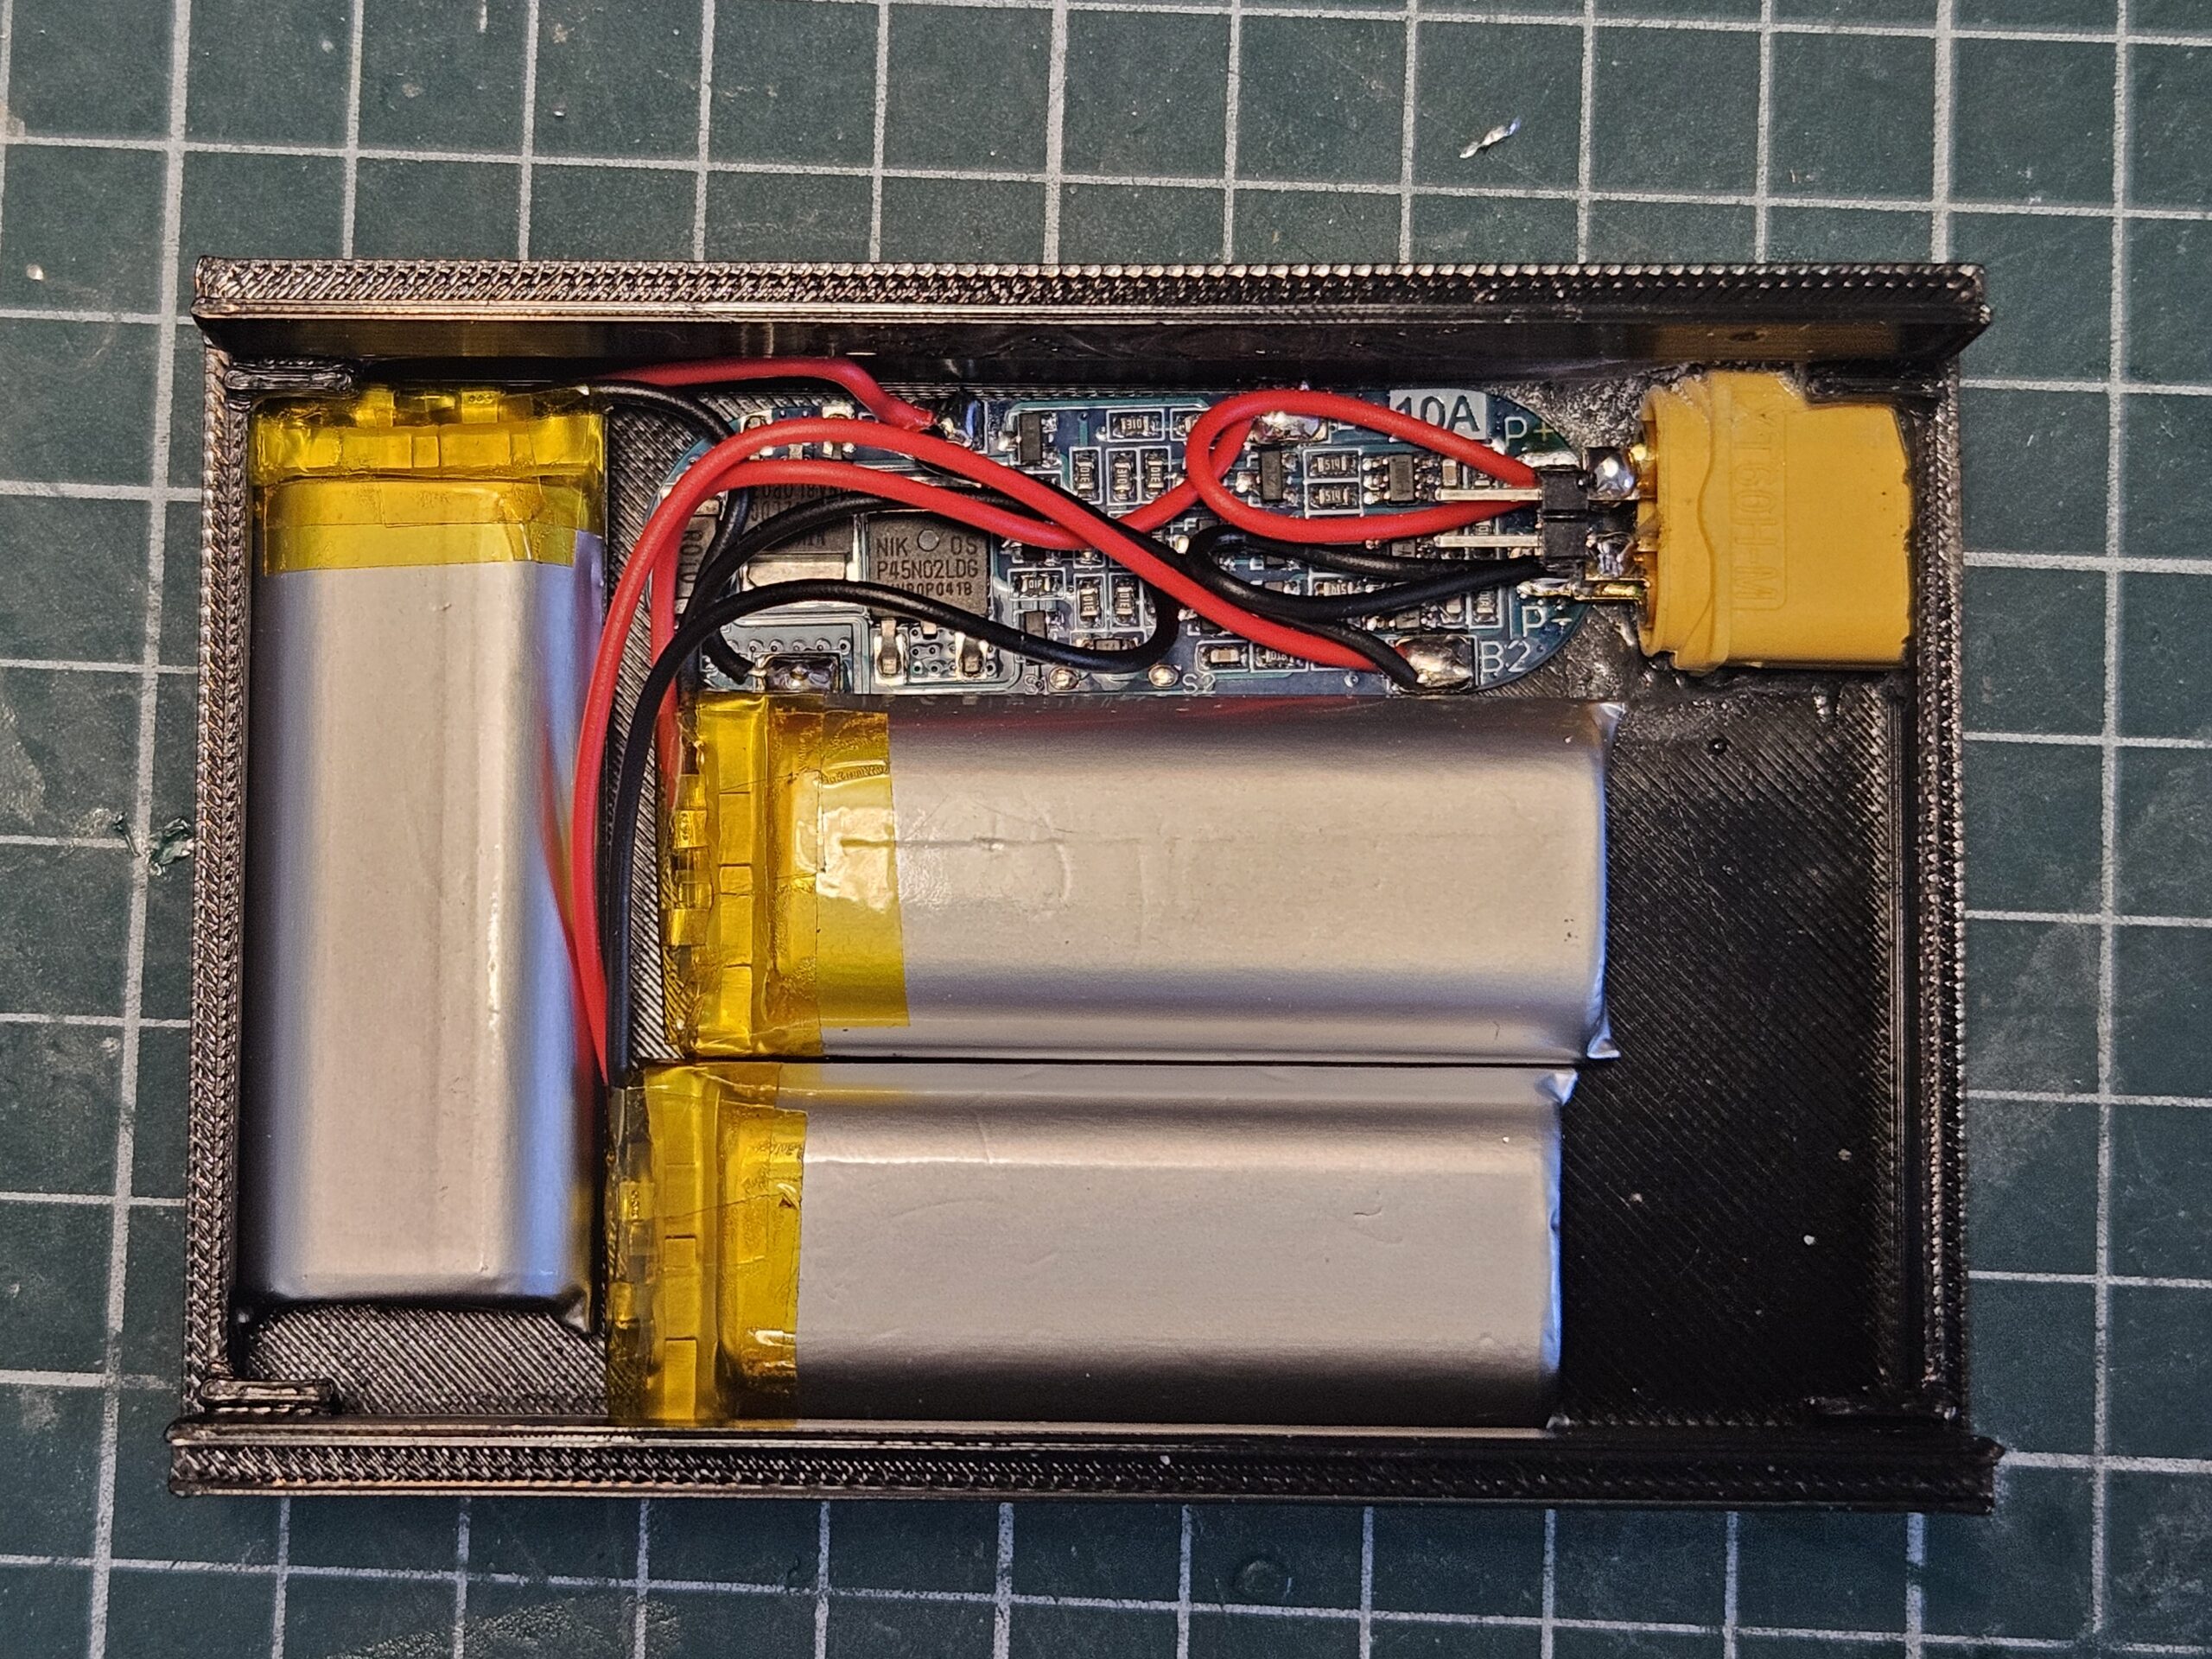
The electronics
It was a fairly simple matter of dry fitting everything into the case, cutting the battery leads to length, then soldering it all together.


Fitting
There’s actually lots of space in the case, and multiple combinations are possible. I decided however with this configuration as it leaves a nice open spot next to the connector which I may be able to do something with down the track. I’m thinking of a mini tuner perhaps.
The cells were hot glued into place. The placement of the BMS would have allowed me to solder the main + and – directly to the XT60 connector, but in the end opted for pig tails as it would more easily allow me to remove it down the track for maintenance.
Note also the two pin header soldered to the XT60. That’s for the QMX power. I would have liked to use a normal connector, but vertical space was at a premium.
Powering the QMX
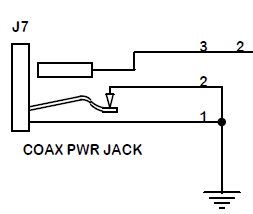
The barrel jack on the QMX has a ground pin which floats when a plug is inserted, pin 2 in the diagram below. This allows for the battery to be disconnected when external power is applied. The BMS’ positive and negative lines were connected to the QMX’s positive (pin 3), and switching ground (pin 2) respectively.

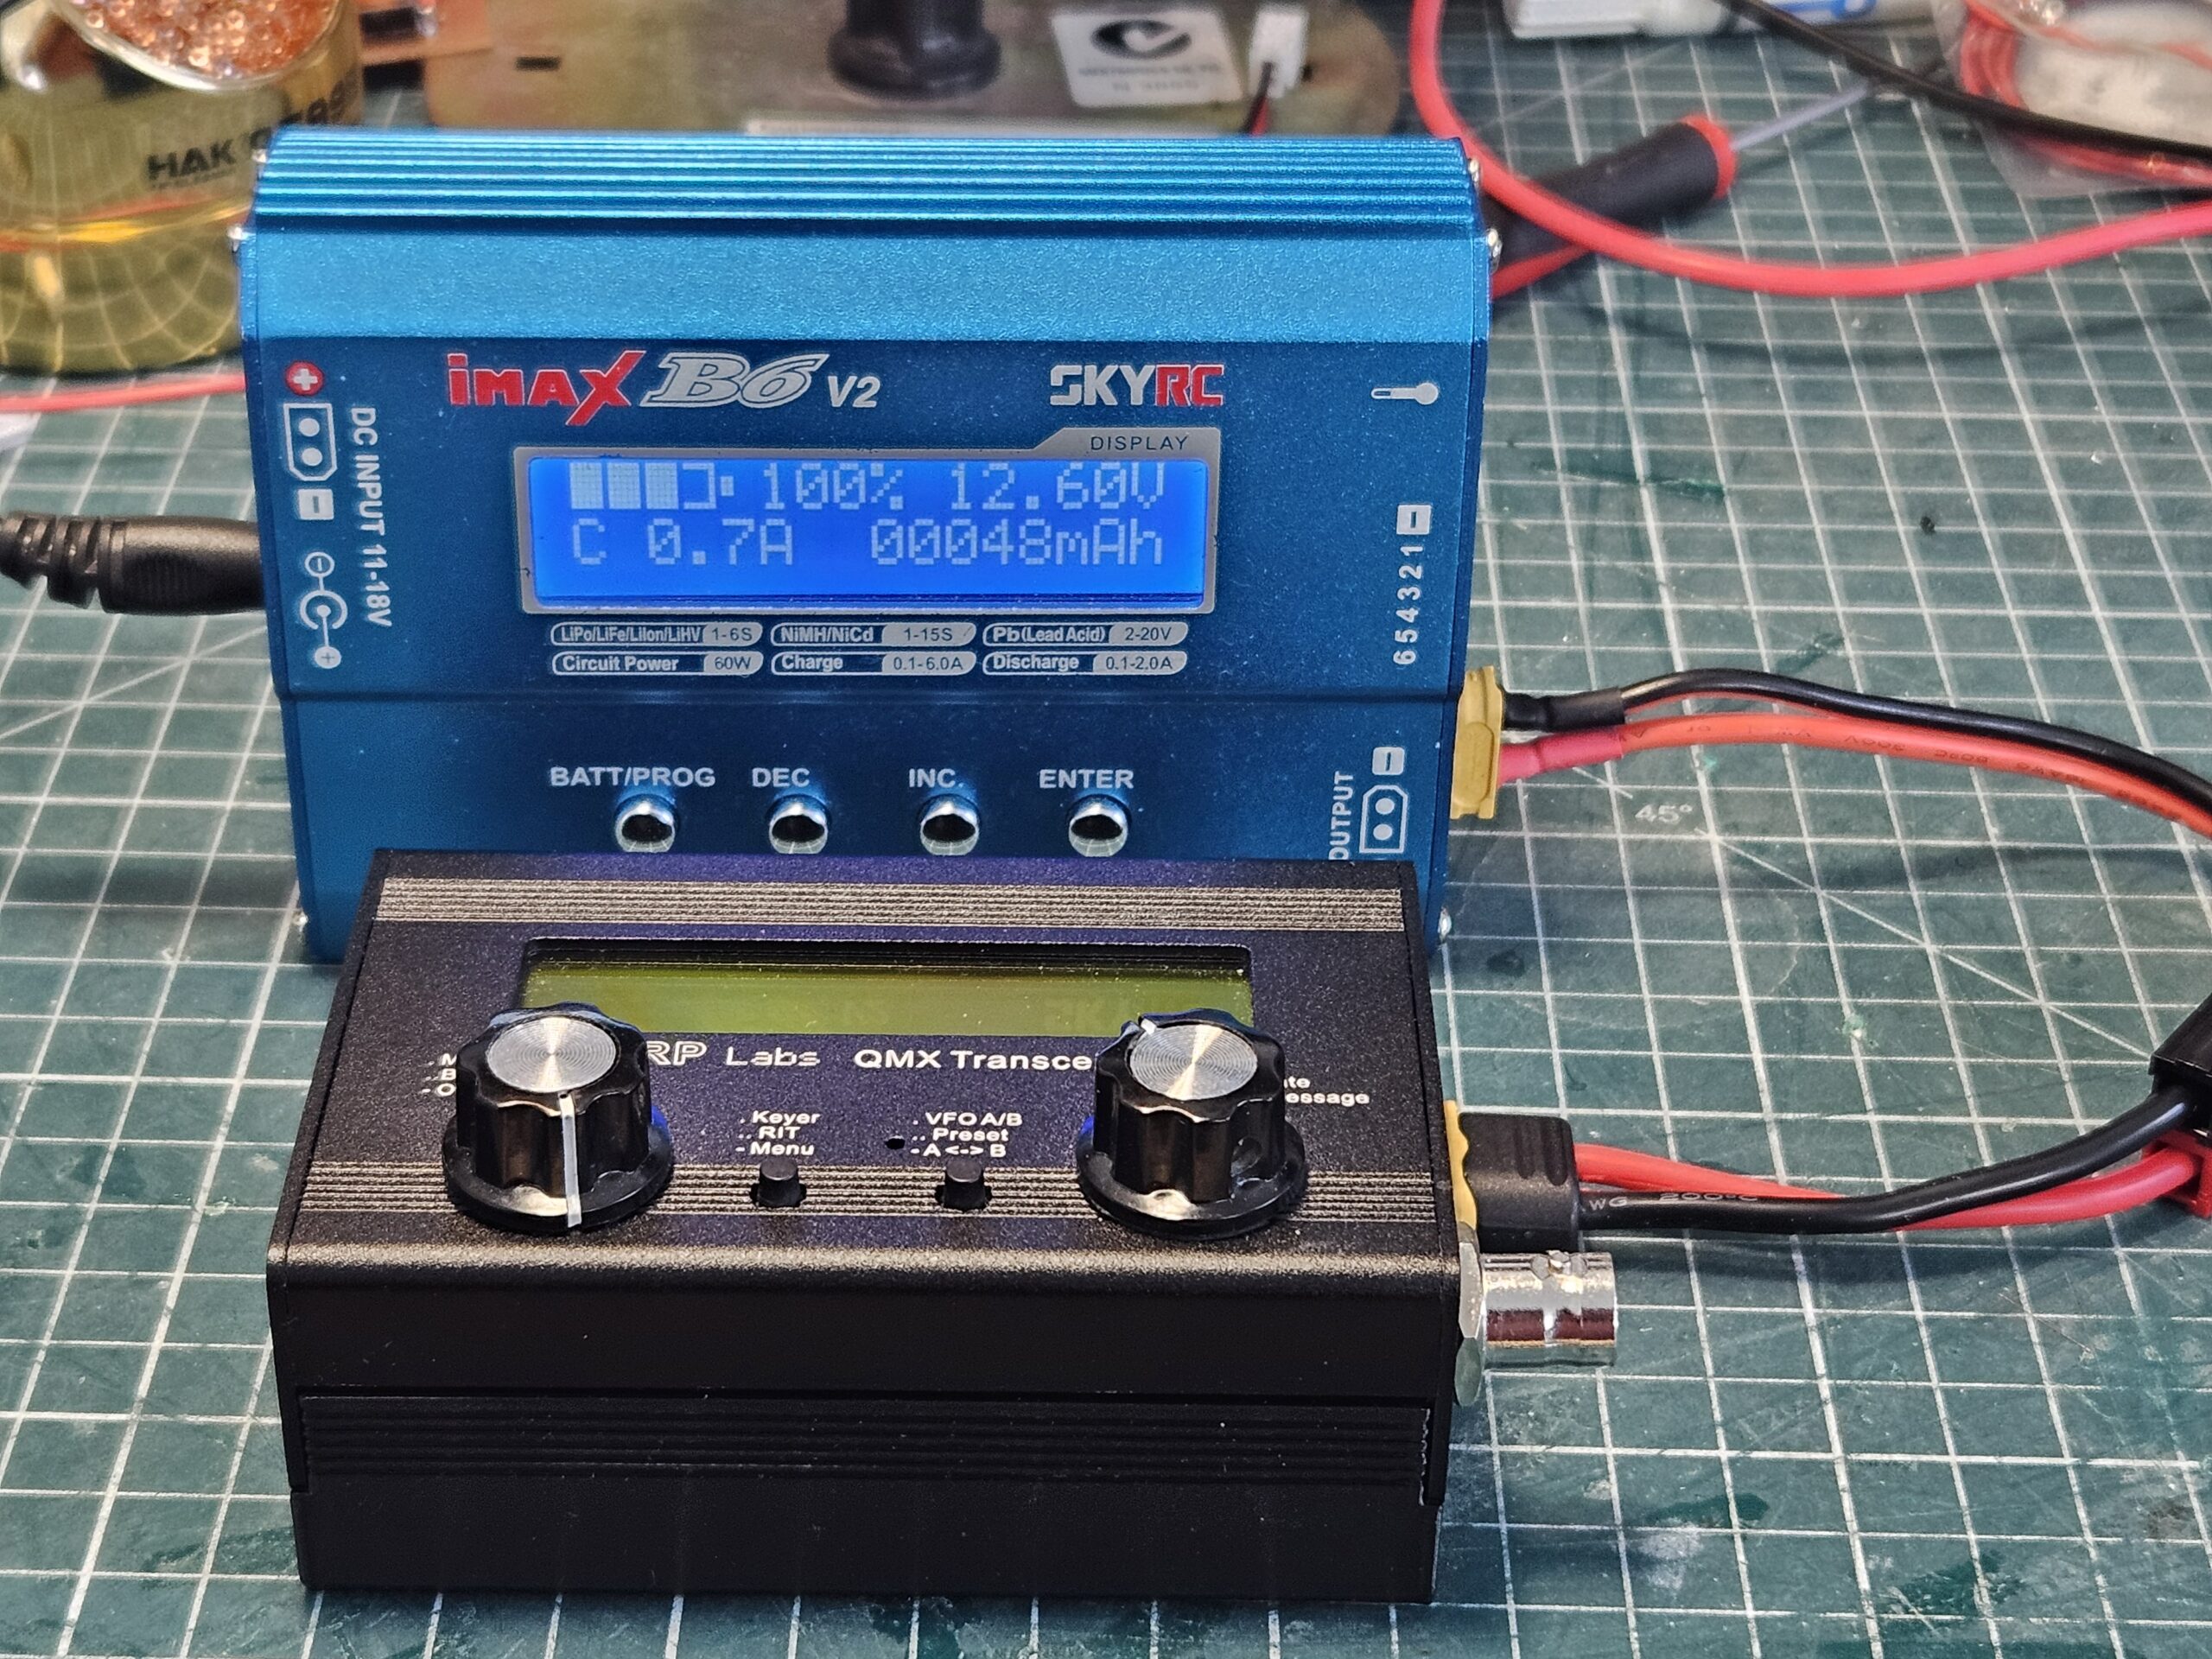
Putting it together
Now all that was left to do was put it all together and charge it up.

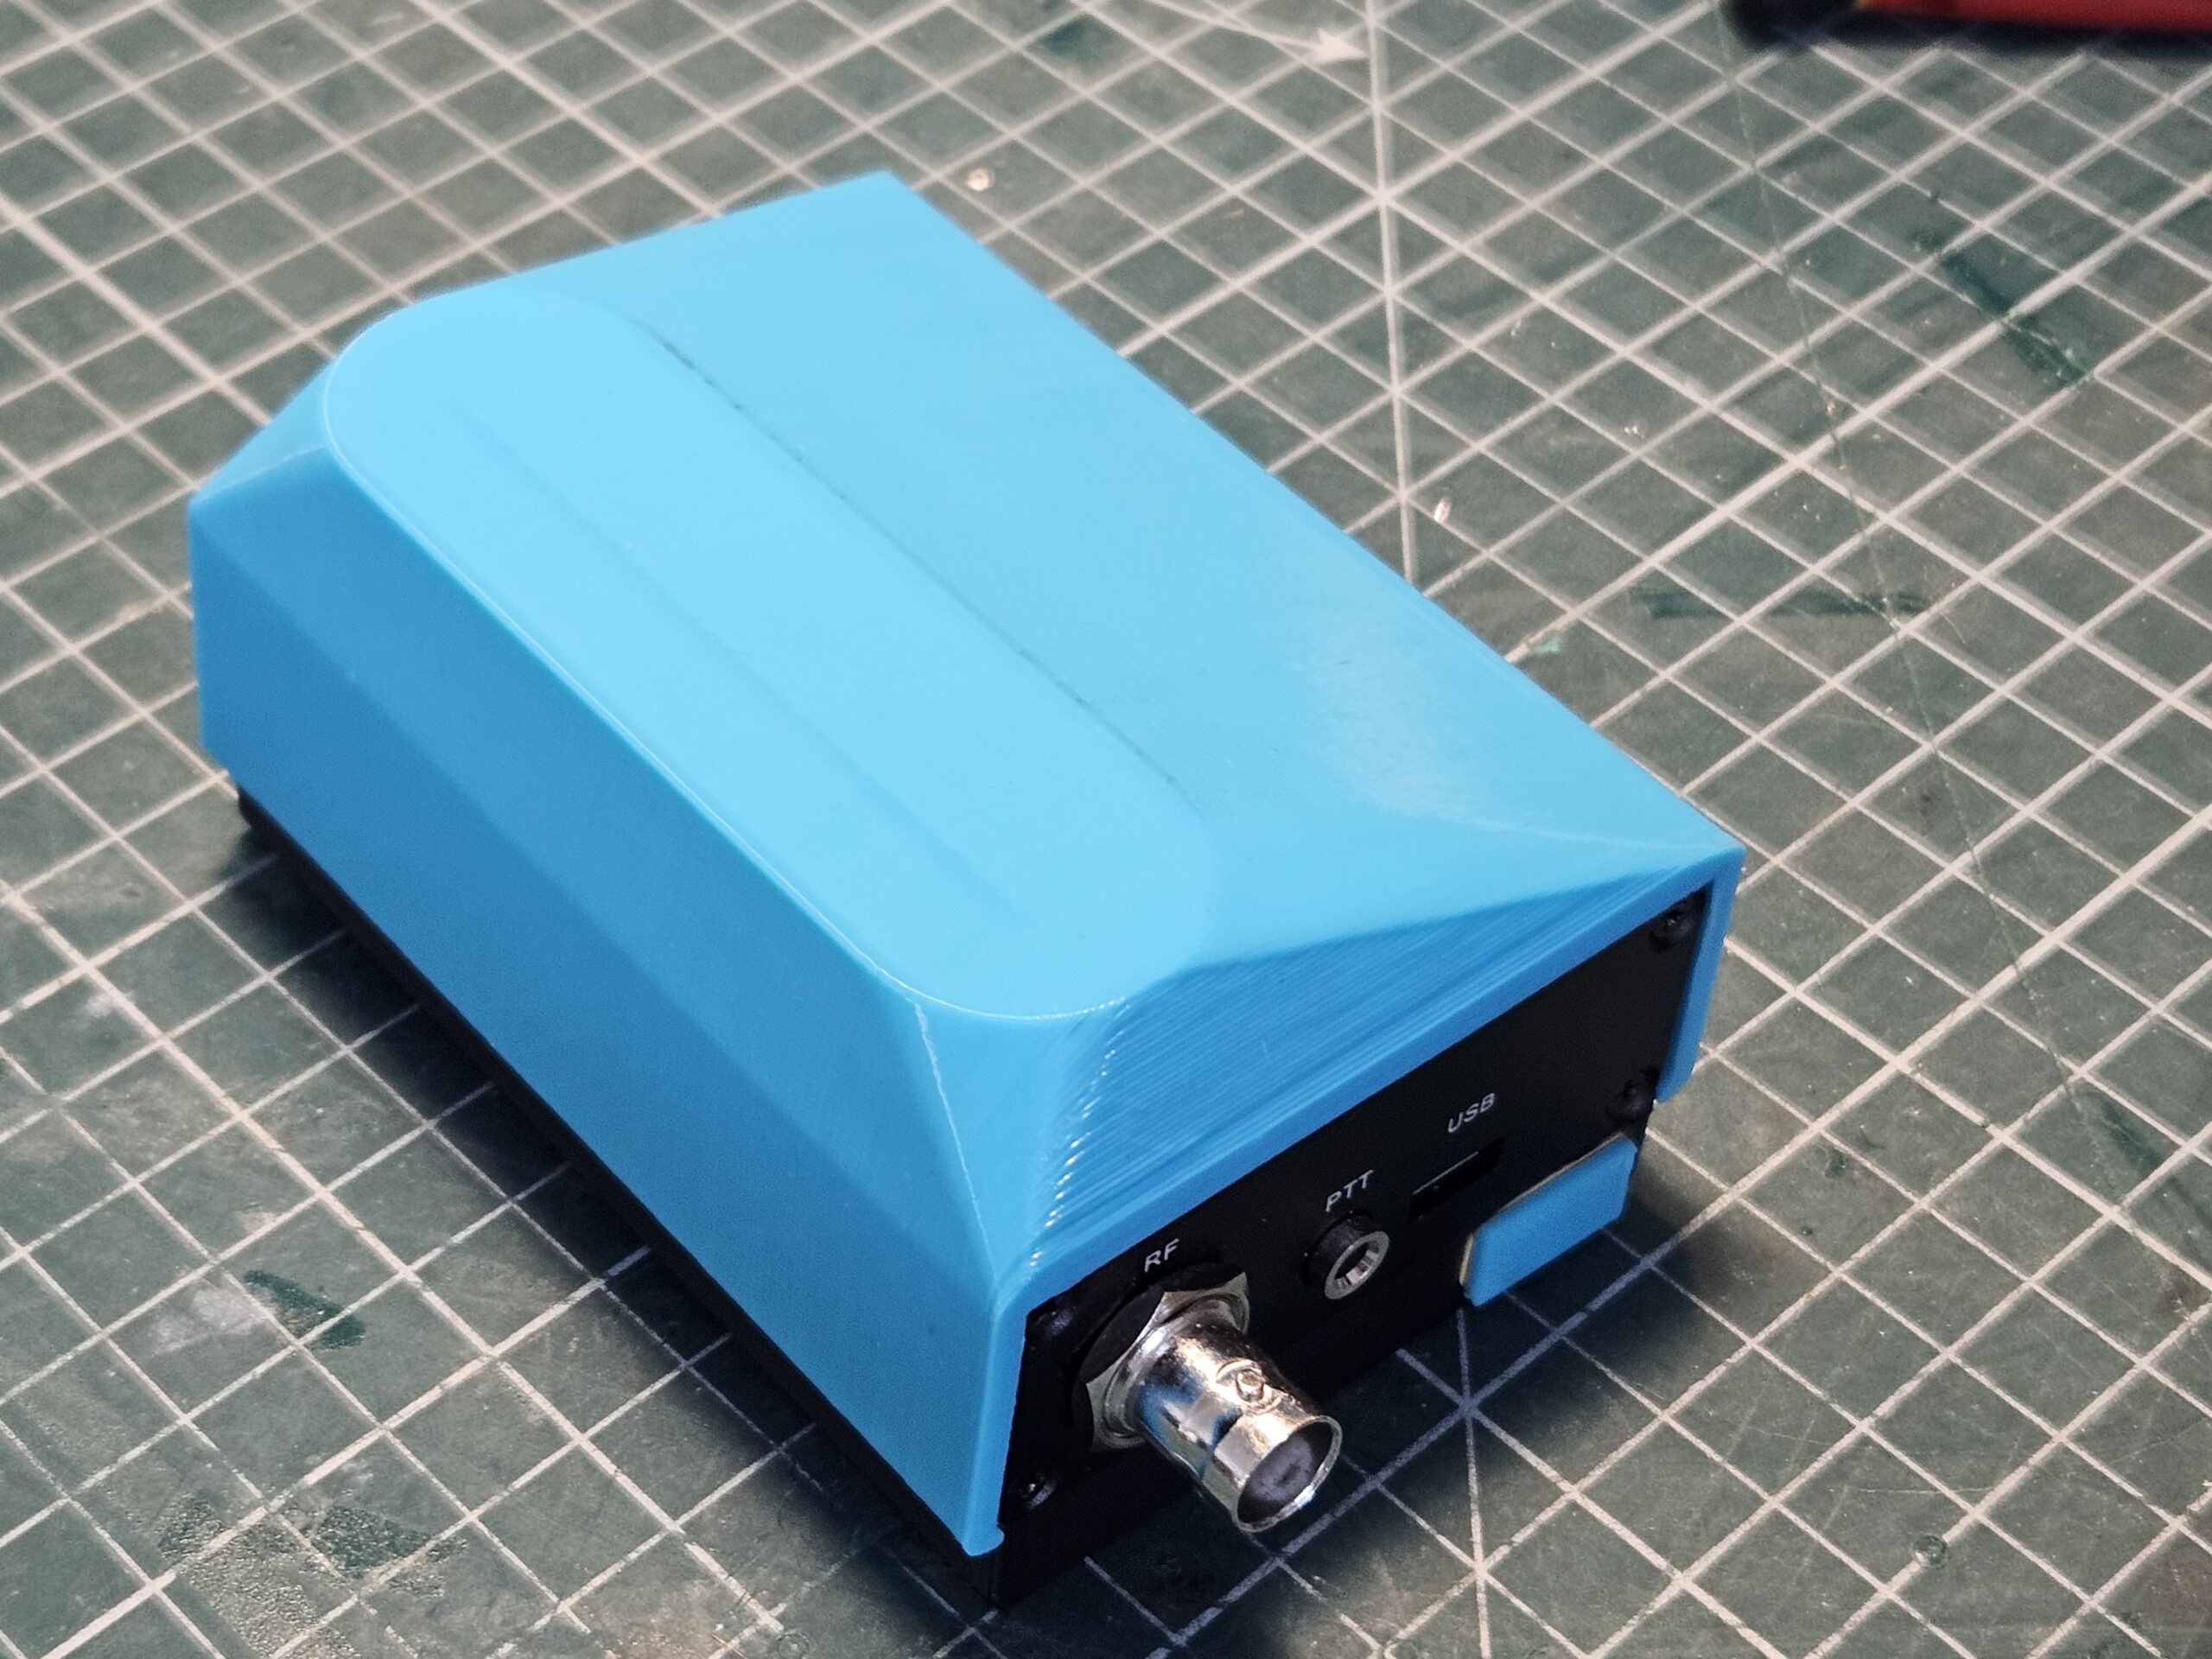
Look ma, no hands external battery!

It really is a very neat package, with the added utility greatly outweighing the extra height, which is barely noticeable. The black print means you don’t really notice that there’s an aftermarket base on it, though perhaps a white or coloured print would be a nice way of customising the unit.
I’ve added some images from a variety of angles to help convey the final product. It’ really is’s rather flash.


The next version …
There are a couple of things I would like to change.
- Move the power port to the same side as the QMX’s power socket. That will negate the internal power cable needing to cross from one to the far corners. To be hones I thought I had worked it all out, but when the print was done, it wasn’t. Doh!
- I’m now very aware that if the power knob is knocked during transport, it’s going drain the battery. I’ll lend my mind to it somewhat, and see if there’s a neat solution. Will it really be an issue though? The QMX already has a travel cap, and has never come off when packed, so only time will tell, though I’m probably over thinking it.
Who’s a happy chappie? Lance is.
Lance
July 2026